Table of Contents
Creating a letterSubmitting a letter for approval Manager approval process Send the letter Sending notes or letters via email For letters compose an email Sending a note as an email View a record of the sent emailCreating a letter
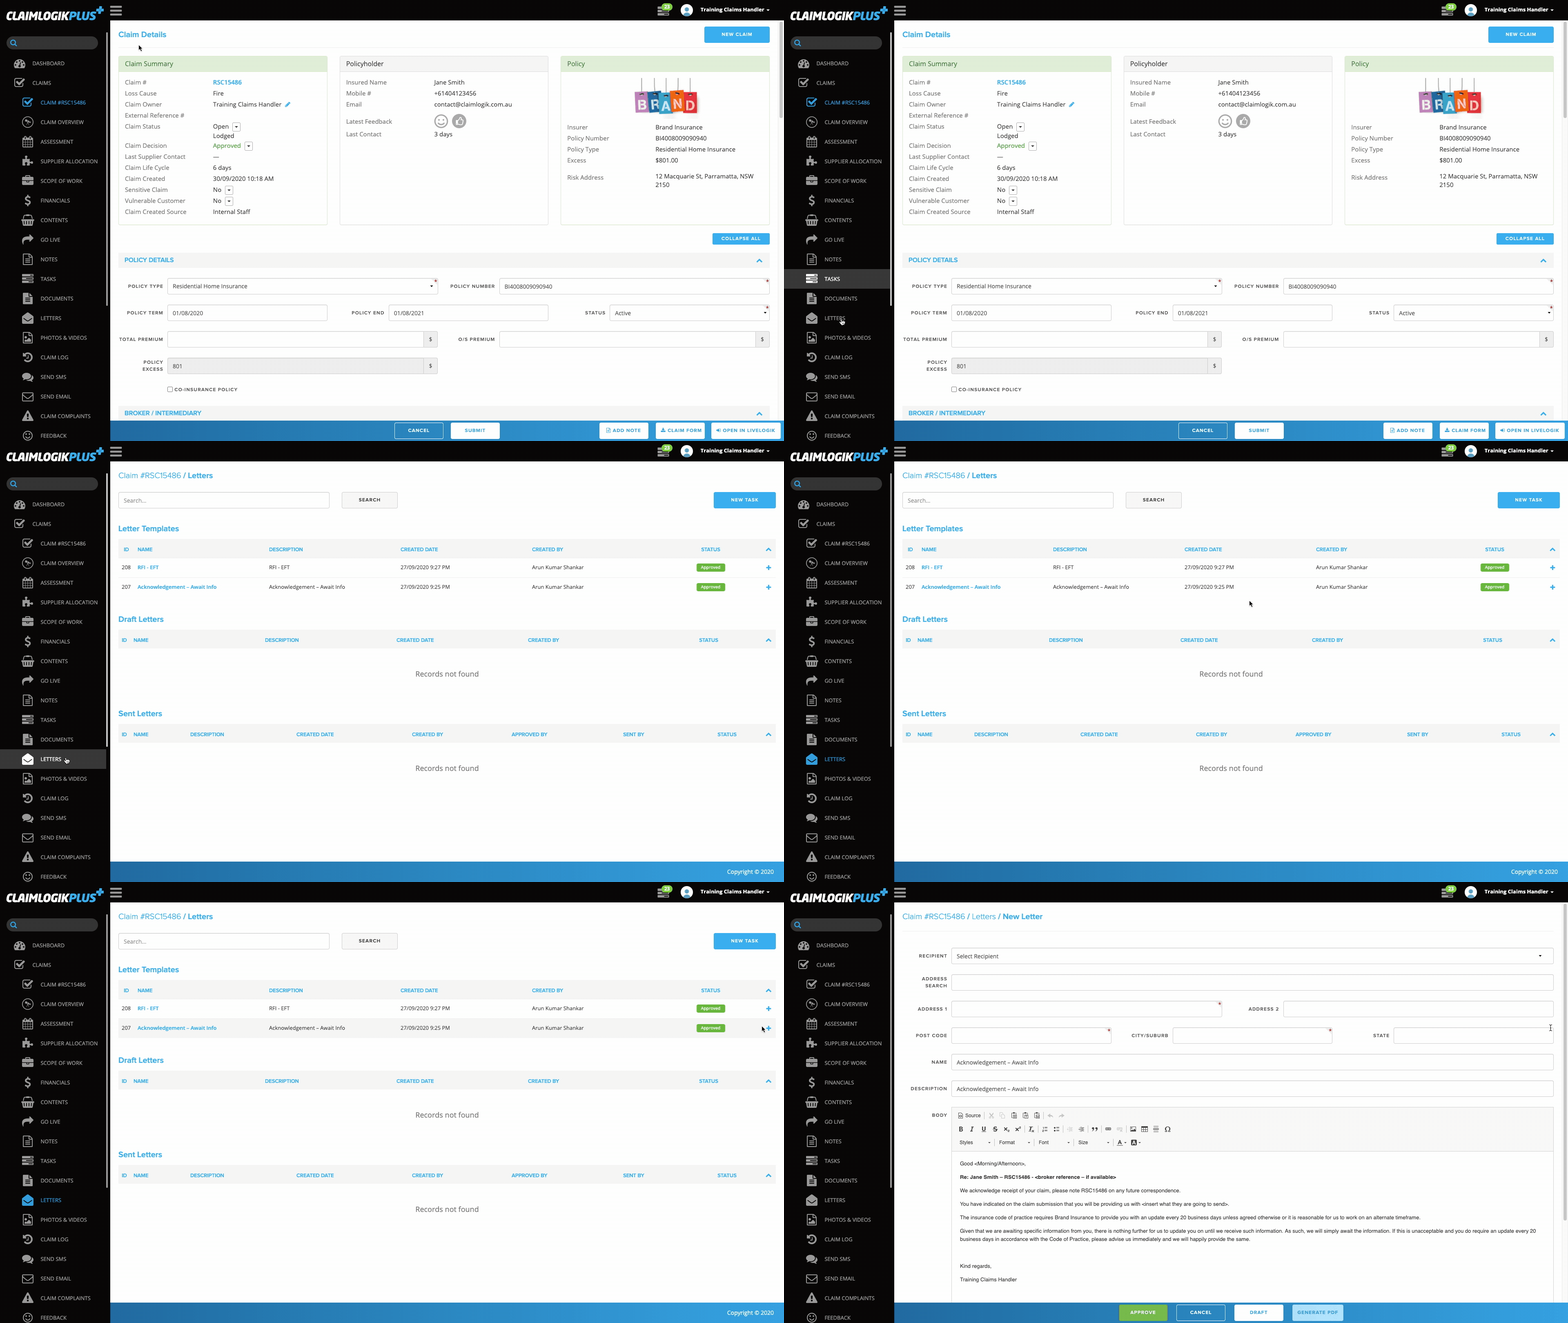
- When in a claim select ‘LETTERS’ from the left-hand side menu.
- Enter name of the letter template you are creating and click ‘SEARCH’.
- Click the ‘+’ button on the right-hand side of the template to create letter.

- If the selected letter template is a payment letter template, select the relevant payment from the ‘SELECT PAYMENT’ drop-down field.
- Select ‘RECIPIENT’ from the Claim Contacts.
- Confirm the address details for recipient and update if required.
- Update the ‘NAME’ and ‘DESCRIPTION’ of the letter if required.
-
The ‘BODY’ will populate with the letter template.
- Review body content and update where required.
- Most templates are configured to highlight changes required. The highlighted areas are identified with the ‘<’ and ‘>’ symbols.
- Note: If you are pasting content from another document (e.g. Word doc), when pasting into the document use Ctrl + Shift + V (Cmd + Shift + V if using a Mac). This will paste the text as plain text into the letter. You will then be able to use the formatting tools in the editor if you need to make any adjustments.

Submitting a letter for approval
-
Based on the processes of your business, some letter templates will require you to seek team manager approval.
- Note: This is process driven not system driven
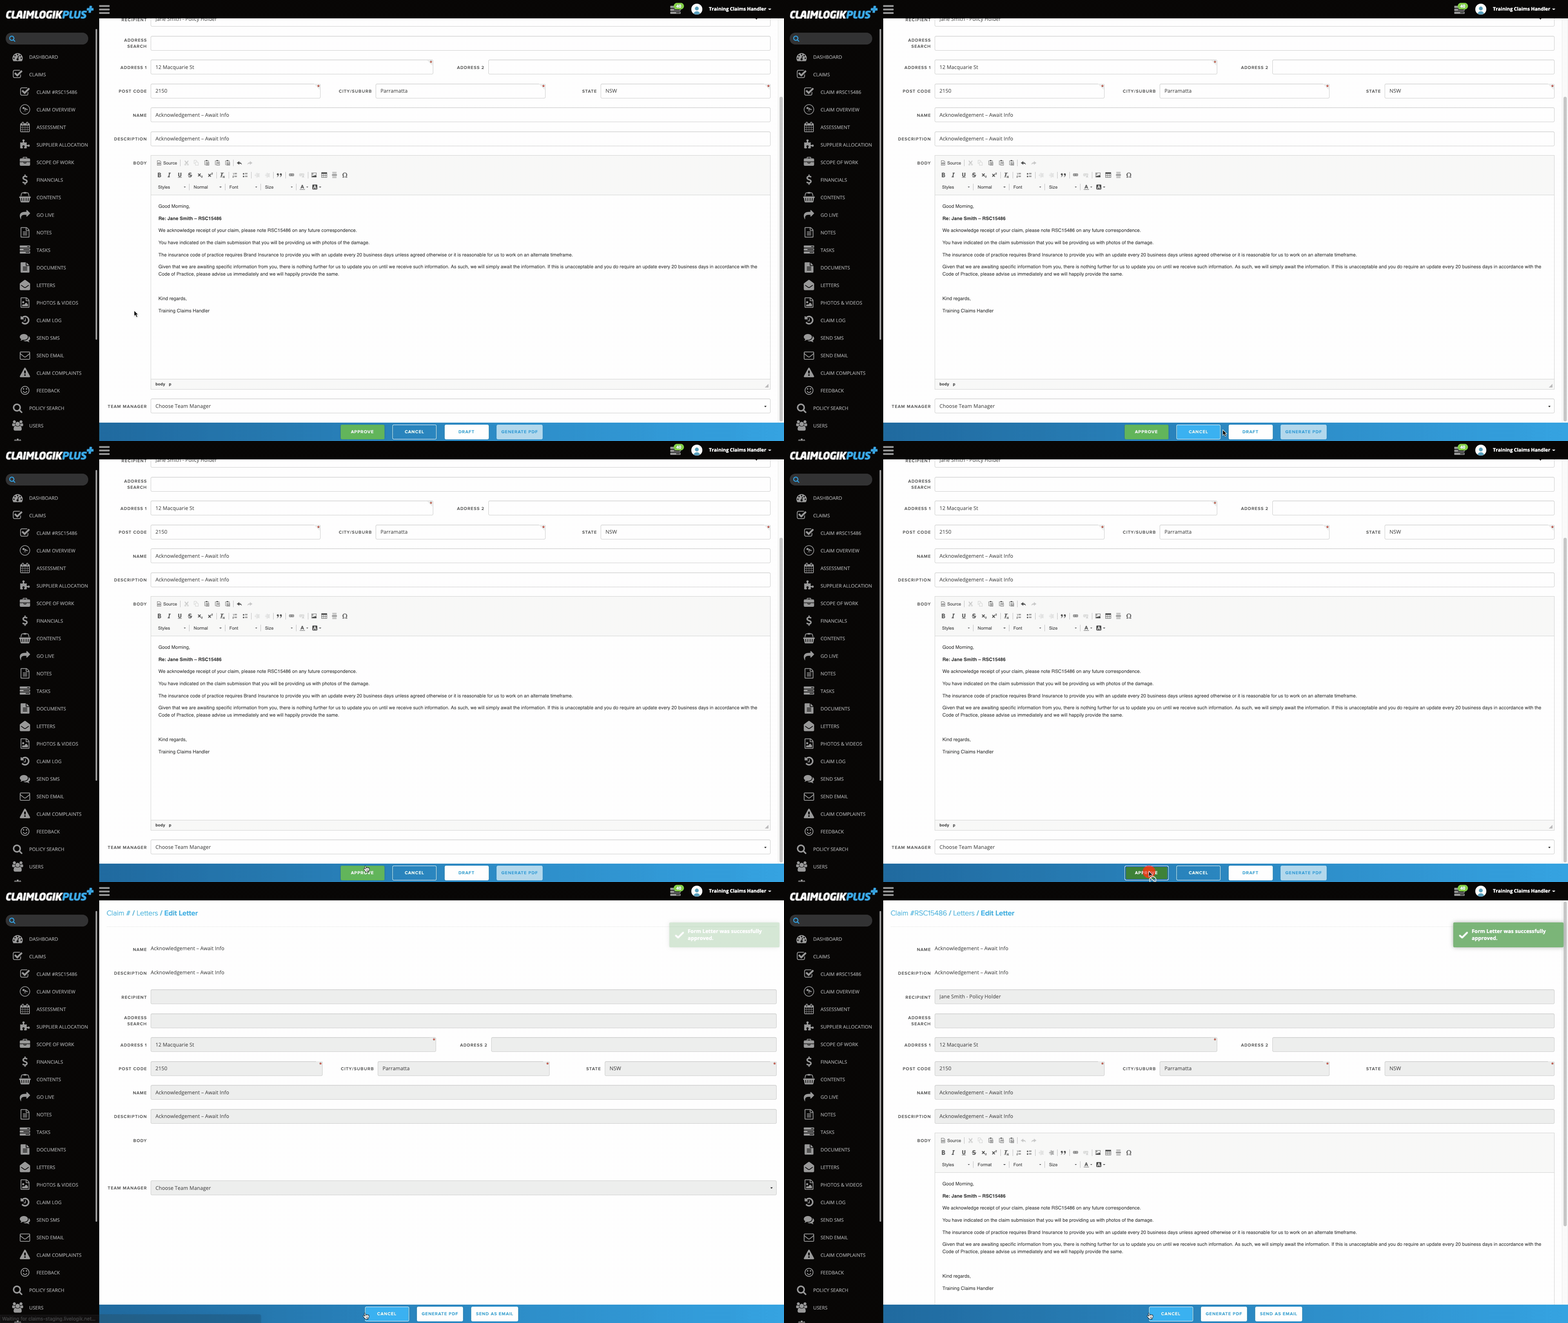
- If the letter requires approval, then select the manager from the ‘TEAM MANAGER’ field that will need to mark the letter approved before sending
- Then click the ‘SUBMIT FOR APPROVAL’ button.

- If you want to save the letter as a draft, click the ‘DRAFT’ button.
If you do not require managerial approval, then you can click the ‘APPROVE’ button.

Manager approval process
The team manager selected from the ‘TEAM MANAGER’ drop-down, will receive a task informing them that they have a letter that requires their approval.
- Select ‘LETTERS’ from the left-hand side menu.
- Scroll down to the ‘Draft Letters’ section.
- Click on the name of the letter requiring approval.
- You will be able to make changes to the letter fields.
- When you are ready to approve the letter, click the ‘APPROVE’ button.

Send the letter
- Once the letter has been approved by one of the two methods above, two new buttons will appear.
-
If you would like to print the letter or attach the letter as a PDF file to an email, click ‘GENERATE PDF’.
Select ‘DOCUMENTS’ from the left-hand side menu.
Click the Download icon
 next to the letter.
 This will download the file to your computer as a PDF file allowing you to print the file.
As the PDF is now saved into the claim Documents you can now attach it to an email within ClaimLogik Plus, refer to the sub-heading ‘For letters compose an email’ below for further information.
By saving as a PDF you will be able to go back to the letter at a later stage and resend it to recipients if required. If you attach it to an email which is sent within CLP you will also be able to preview the attachment to the email in the Claim Log.

-
If you would like to send the letter as an email, click the ‘SEND AS EMAIL’ button. A pop-up window will display allowing you to send the letter as an email.
Note: Selecting this option does not create a PDF version of the letter, it will capture the email in the claim log as a record, however, it cannot be resent or modified. We suggest using the previous method (Generate PDF) to save this version of the letter for future use.

Sending notes or letters via email
It is possible to send Letters or update notes via email whilst in a claim file.
For letters compose an email
-
Select ‘SEND EMAIL’ from the left-hand side menu.
- A pop-up window will display.
- Add external email addresses to the ‘To’, ‘CC’ & ‘BCC’ fields just like you would with sending an email from your usual emailing tool.
- You can add claim contacts to the email by selecting them from the ‘Additional Recipients’ field.
- The ‘SUBJECT’ field is pre-populated with the insurers name and the claim number.
- The ‘MESSAGE’ field can be used just as you would with your email usual email tool.
-
To attach files already attached to the claim, click the checkbox under ‘FILES’ to select the files you wish to attach.
Note: This is where you can send or re-send letters which have been previously generated as a PDF and stored in the claim Documents. - To attach additional files, click the ‘UPLOAD FILES’ button and load from a file on your desktop.
- Select the file from the file selection window and then click ‘Open’.
- Click the ‘SEND’ button to send the email.
- Note: a pop-up will display with either unsuccessful or successful sent. You will not be automatically navigated to a new page.

Sending a note as an email
- Select ‘NOTES’ from the left-hand side menu.
-
Click the ‘ADD NOTE’ button.
- A pop-up window will display.
- Based on your configuration, note templates will be available for your selection.
- Fill in the note form.
- Select the checkbox labelled ‘SEND NOTE IN AN EMAIL’.
-
A new drop-down will appear, allowing you to select the recipients of the email from the list of claim contacts. The selected recipients to receive the email, will be highlighted in blue.
Note: Notes sent as emails are not able to be formatted. The email displays the text in body of the email and uses the user profile’s signature. If you would like to format the email, we suggest using the ‘SEND EMAIL’ or ‘LETTER’ functionality. - Once you are happy with the note and the assigned recipients, click ‘SAVE’.
A note that is sent via email, will display the email address in the note box under the heading ‘Recipients’.

View a record of the sent email
- Select ‘CLAIM LOG’ from the left-hand side menu.
- From the ‘All Categories’ drop-down menu, select ‘Claim Send Email’.
-
You should now see all emails sent from within the claim.
- Note: attachments that were sent with the email (for example PDFs), can be previewed within the Claim Log, by clicking on the file name in blue text.
