Creating and submitting a payment

Written by Wilbur Admin
Updated at May 9th, 2022
Table of Contents
Creating a paymentSubmitting a payment for approvalEditing a paymentCancelling a paymentCreating a payment
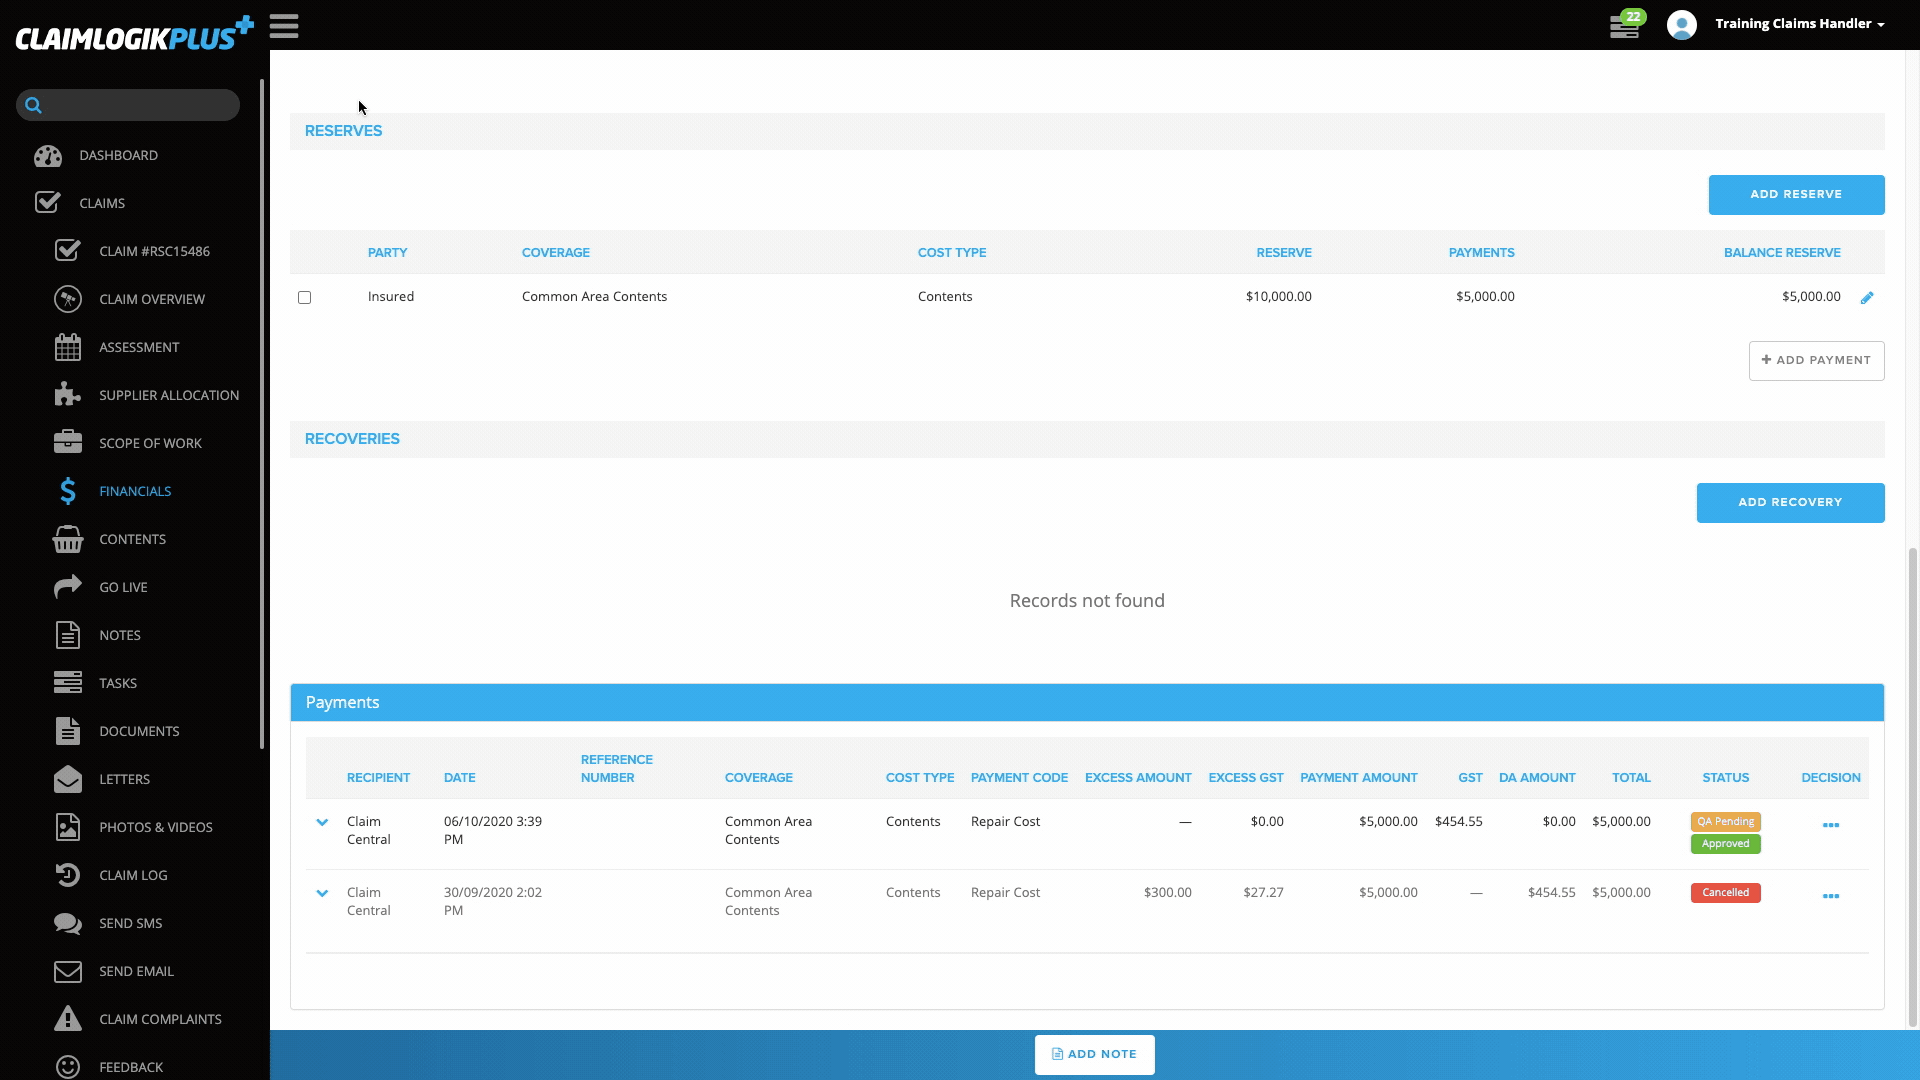
- Select ‘FINANCIALS’ from the left-hand side menu.
- Scroll down to the ‘RESERVES’.
- Select the reserve you are making a payment against using the checkbox
 on the left-hand side.
 - Click ‘ADD PAYMENT’ button.
Note: If the status of your claim is ‘PENDING’, you will receive a warning before proceeding with creating a payment.
- Enter the details of the payment in the popup window including:
- Payment Category (Supplier, Service Provider or Direct Payment)
- Payment Mode/Type (EFT or Cheque)
- Payee (this list is dependent on the Payment Category selected and loaded suppliers and parties to the claim)
- Valid tax invoice (supplier payments only – if it is a valid tax invoice you will need to enter the invoice number and the date)
- Supplier allocated by (supplier payments only)
- Payment Code (Drop-down list configured for each client)
- GST Free (Yes or No)
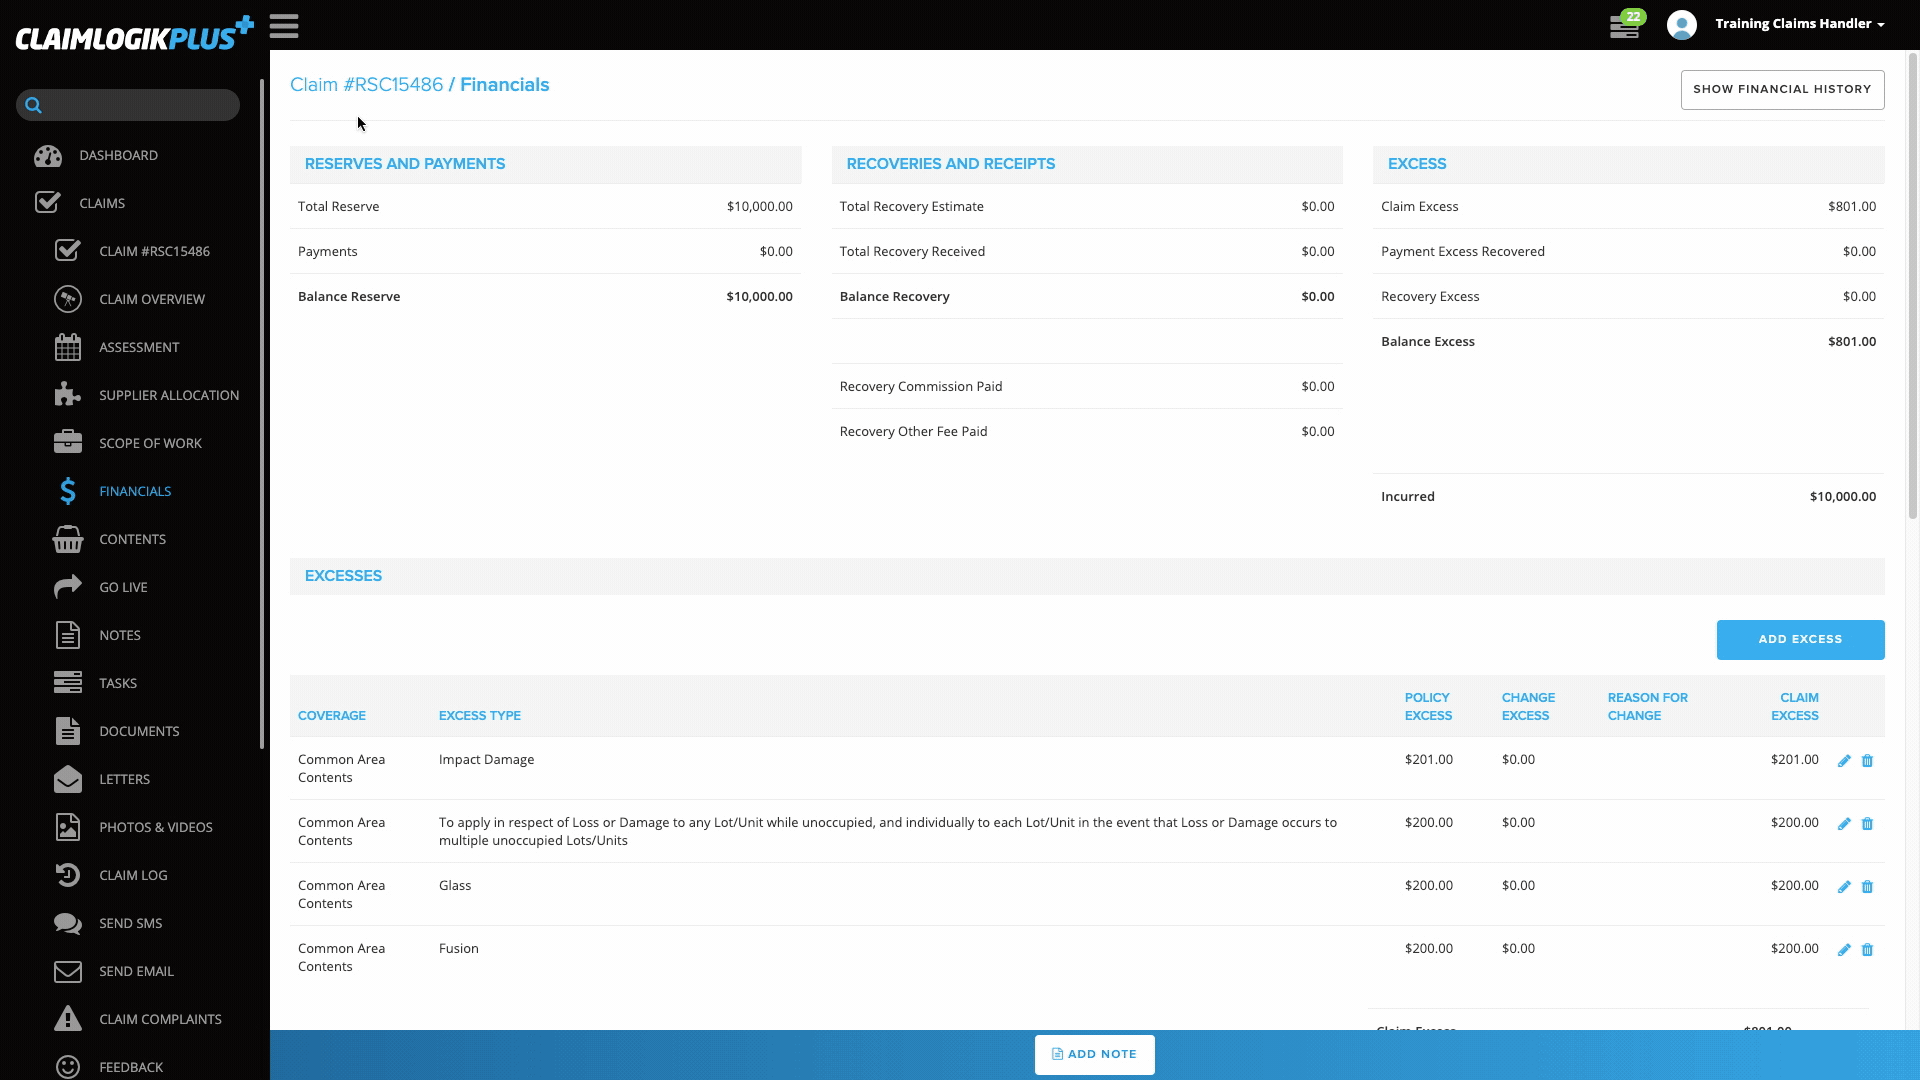
Note: If you are raising a payment that is determined as “GST Free” then you must raise the payment for the full amount of the invoice, you must set the “Claimant ITC” field to 0%. The logic is that because the original supply was GST Free the claimant cannot claim any ITC in respect of that payment. You should also see the GST Free flag against the payment to “Yes”. The GST Free flag has no automation attached to it. - Excess to be deducted (Are you deducting excess from this payment, if so, enter the dollar value, if not, leave blank) Note: If you are creating a direct payment, the balance of the excess due on the claim will default to this field.
- Payment Amount GST Incl
- GST Amount (This should calculate automatically if GST is applied)
- If this is the last payment, tick ‘FINAL PAYMENT’ at bottom left corner.
- Note: This alerts the approver that this is the final payment on this claim and the claim can be closed once this has been processed.
- Click ‘SAVE´ once payment is complete.
Submitting a payment for approval
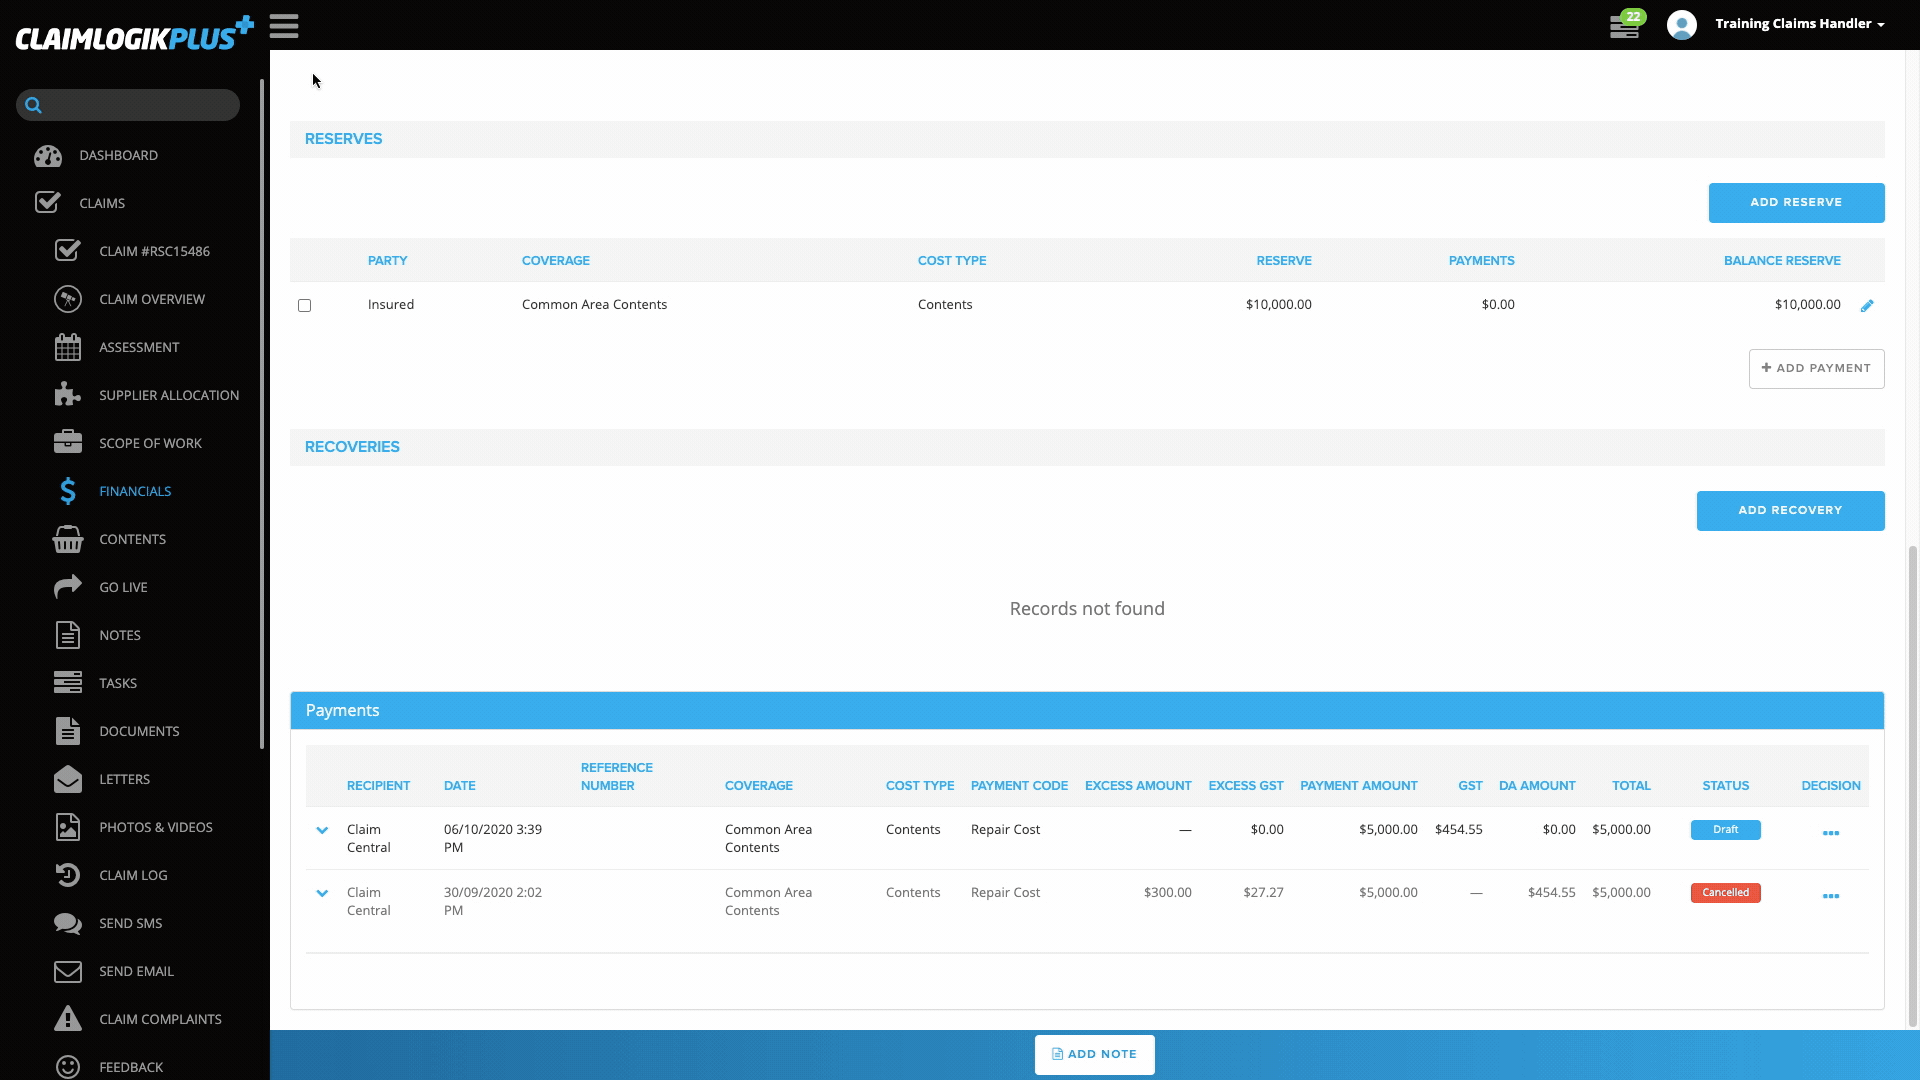
- Scroll down to ‘PAYMENTS’ at the bottom of the ‘FINANCIALS’ page.
- Click the down arrow icon
 on the left-hand side of the payment.
 - Click the ‘SUBMIT’ button.
Editing a payment
- Scroll down to ‘PAYMENTS’ at the bottom of the ‘FINANCIALS’ page.
- Click the down arrow icon
 on the left-hand side of the payment.
 - If the payment has not been submitted you are able to click the ‘EDIT’ button.
- Update payment details in the popup window and click ‘SAVE’.
- If the payment has already been submitted, then you will only be able to view a read-only version of the payment screen, to access this click on the ‘View Payments Detail’ Icon

Note – you will only be able to edit a payment prior to it being submitted for QA. If you need to make a change, you will need to cancel the payment (see below) and then resubmit a new payment.
Cancelling a payment
- Scroll down to ‘PAYMENTS’ at the bottom of the ‘FINANCIALS’ page.
- Click the down arrow icon
 on the left-hand side of the payment that you wish to cancel.
 - Click the red ‘CANCEL’ button.
Note – you will be able to cancel a payment that has been QA approved, but you will not be able to cancel a payment that has been processed to the bank (this includes once it has reconciled in the bank reconciliation feature). Cheque payments can be cancelled up to the point of a banked date and cheque number logged in the Banking section. After this point if you wish to reissue the cheque payment, it will need to be reversed and a new payment will need to be processed on the claim (this will ensure financial transactions are accurate on the claim).